Remote Save Wizard
![]()
User Rights
Note that Web Client saves the data for the reserved codes in
...\Application Data\ MechWorks\DBWebViewerDocuments
in order to remember them across the sessions.
The user who reserves the codes must therefore have full access to this folder.
Suppose you need to create a new part remotely.
Normally you would create your part remotely, submit it to the server and have somebody, normaly an administrator, review the part, rename it and categorize it for you.
Using the Remote Save Wizard you can reserve a new ID from the server, create ad edit the new part locally, then upload it to the server and have it stored and registered in the database in the right location and assigned to the correct project.
How to categorize a new document
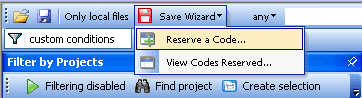
The first step is to reserve a new code from the Web Client. In the menu bar select Save Wizard, Reserve a Code...
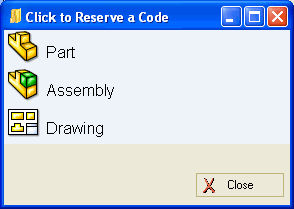
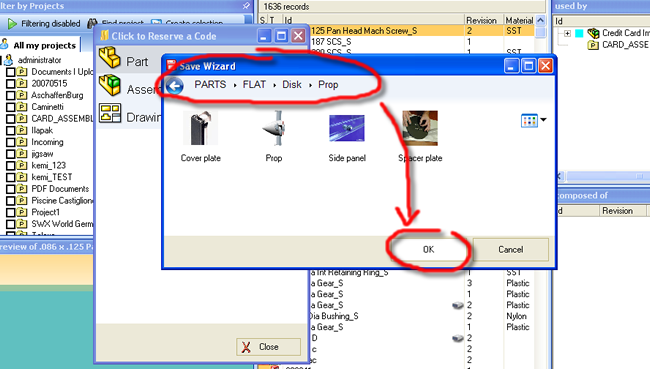
A new dialog appears on screen requesting you to select the type of CAD document you need to create:
Now categorize your new part as you would do in the Save Wizard of DBWorks, clicking the icons in the dialog:
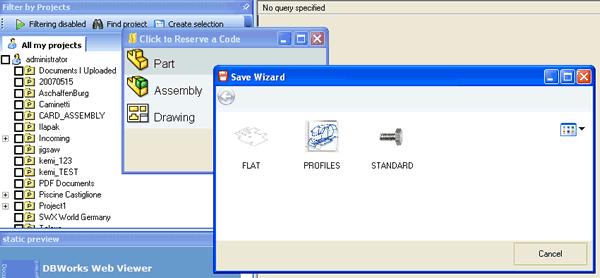
When you reach a leaf in the tree of categories the OK button becomes visible. Click it to confirm your choice.
Web Client downloads an empty template prepared by the Administrator in the folder '/wwwroot/webviewer/cache' to the download directory and assigns it the final file name assigned automatically by the server in accordance with your selections.
The template files must be contained in zip files named templateForPart.zip, templateForAssembly.zip, templateForDrawing.zip
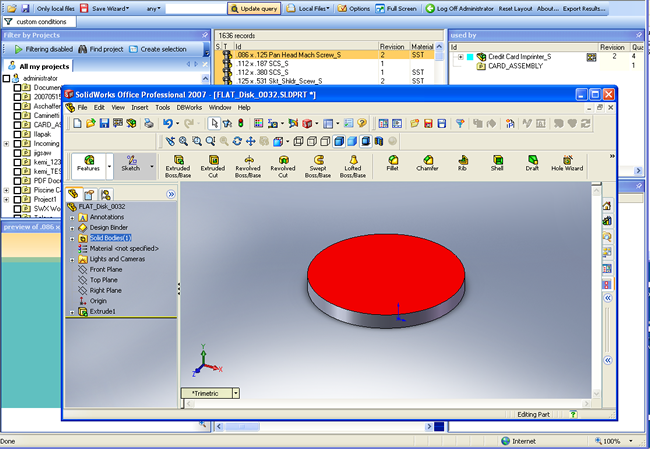
The dialog of reserved code is also displayed, including your new part. The icon representing a hard drive beside the part indicates that the file is local and ready for editing.

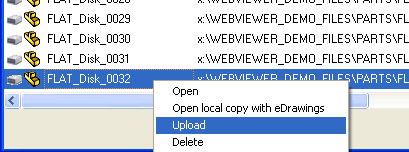
You can open the file directly from the dialog of the Reserved Codes right clicking the part and selecting

When you are satisfied with your new part, save it
Note that although the code was reserved the record for the new part has not been created yet. The information concerning the new record are maintained on the client and will be sent with the file on the upload.
To upload your part, in the dialog of Reserved Codes right click your part and select upload.
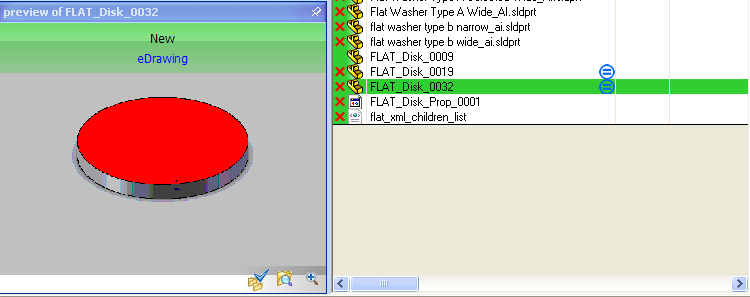
If in the meanwhile you have closed the Web Client log in again and display the Reserved Codes from the Save Wizard menu button.
Note that in order to have your new part registered immediately, a Tasks Client must be active server side.
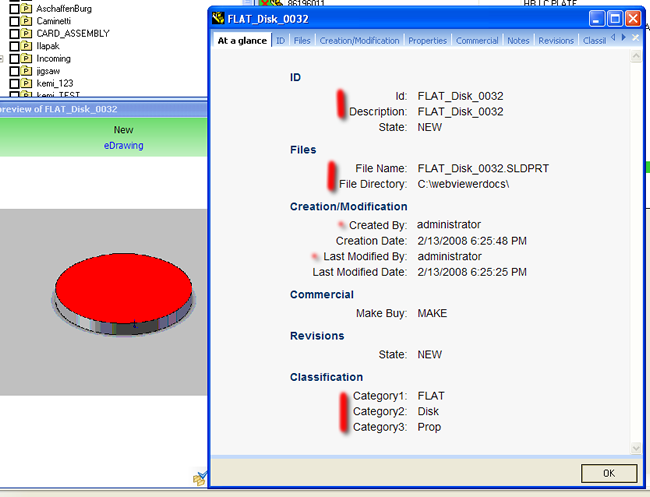
After a few seconds you receive a notification that the part has been registered correctly and you can query the database using the Web Client to see it in the grid:
The screenshot of a View Record illustrates how the field values have been updated correctly for the new record.
The fields marked in red are the ones set by the default script.
Please note that you can set the values also of other fields from inside the script.